Emergency Response Guide
What to do in the first minutes, hours, and day.
What actually happens after you call for help? This guide walks through the complete water damage restoration process step by step: inspection, extraction, drying, cleaning, and repairs, plus the equipment used, realistic timelines for each phase, and what you as the homeowner should expect along the way.
Everything starts with finding all the water, not just the water you can see.
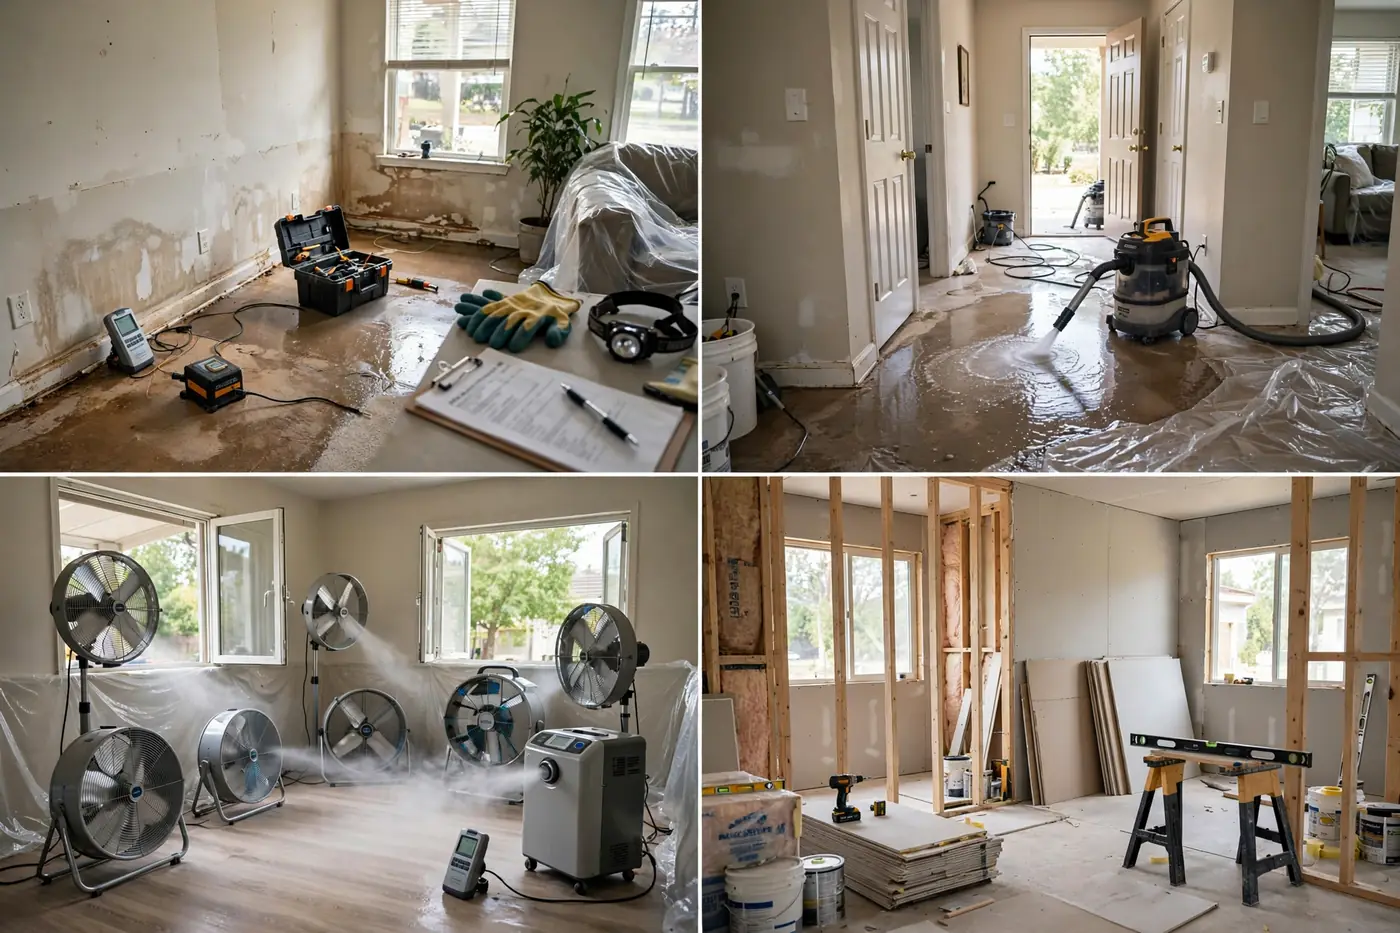
A trained technician inspects the property and builds a moisture map: a room-by-room record of which materials are wet and how wet they are. This typically involves:
Skipping proper mapping is the most common cause of failed drying jobs. Surfaces can feel dry while wall cavities stay wet, which is why this step is never rushed.
Standing water comes out first, fast. Every hour of standing water extends the drying that follows.
Thorough water extraction is the highest-leverage step in the whole process. Removing bulk water quickly can cut days off the drying phase.
This is the longest phase and the most technical. Florida's humidity makes it especially important to do right.
After extraction, moisture remains trapped in drywall, wood framing, subfloors, and other materials. Structural drying removes it with a designed system, not just fans pointed at walls:
| Equipment | What it does | What you will notice |
|---|---|---|
| Air movers | Speed evaporation from wet surfaces | Steady noise, warm airflow; keep clear of intakes |
| Dehumidifiers | Remove moisture from the air | Humid air exhaust, condensate draining; do not turn off |
| Moisture meters | Track drying progress in materials | Technician visits for readings |
| Thermal cameras | Find hidden wet areas | Brief inspections, no disruption |
| HEPA air scrubbers | Filter airborne particles during work | Low hum, helps with dust and odors |
Homeowner rules during drying: keep equipment running continuously, keep exterior doors and windows closed so dehumidifiers are not fighting Florida's outdoor humidity, and keep children and pets away from equipment and cords.
Once dry, affected areas are cleaned to remove residues, odors, and contaminants.
Cleaning is also when any mold growth discovered during the job is addressed as part of the moisture problem, since mold without moisture control always returns.
In Florida, mold prevention is not an add-on, it is part of doing the job correctly.
Florida's warmth and humidity mean mold can begin colonizing damp drywall, wood, and fabrics quickly. Prevention is built into the process rather than treated as a separate service:
If visible mold is already present when help arrives, it is handled as part of the overall moisture response, with containment to keep spores from spreading to clean areas during removal.
The final phase puts the property back together.
Restoration ranges from minor to major depending on what was removed:
This phase is often scheduled after the drying phase is fully verified, and it is the part most visible in the final result. Keep all contractor documentation with your insurance records, since repairs are part of the claim.
Timelines depend on water category, area size, materials, and Florida humidity. These are typical patterns, not promises.
| Phase | Typical duration | What affects it |
|---|---|---|
| Inspection and mapping | Same visit, a few hours | Property size, accessibility of wet areas |
| Water extraction | Hours to a day | Volume of standing water, number of rooms |
| Drying and monitoring | Several days for small jobs; a week or more for large ones | Material types, humidity, whether demolition was needed |
| Cleaning and sanitizing | Hours to days | Contamination level, contents volume |
| Repairs and restoration | Days to weeks | Scope of rebuild, material lead times |
The drying phase is the least predictable because it depends on measured moisture, not the calendar. A job is done when meters confirm dry standards, which protects you from hidden moisture problems later.
Knowing what is normal makes the process far less stressful.
The same process works everywhere, but Florida conditions demand specific adjustments.
It varies widely. A small clean-water incident might need a few days of drying plus minor repairs, while a large or contaminated loss can take weeks including rebuild. Drying time depends on measured moisture rather than a fixed schedule. See our detailed article on restoration timelines.
Usually not, unless there is sewage contamination, major structural damage, or electrical hazards. Equipment is noisy and takes up space, but affected areas can often be isolated while you use the rest of the home.
Surfaces dry first while moisture remains inside drywall, framing, and subfloors. Meters measure inside materials, and drying continues until those readings reach dry standards. Stopping early leaves hidden moisture that causes mold and rot later.
Not always. Clean-water incidents in accessible areas can often be dried in place. Contaminated water, long-soaked materials, or trapped wall-cavity moisture usually require controlled removal so drying and treatment can reach everywhere.
Category 1 is clean water from supply lines. Category 2 is gray water with some contaminants, such as washing machine or dishwasher discharge. Category 3 is black water, including sewage and floodwater, which requires strict safety procedures and removal of porous materials it touched.
Renting fans without a moisture map and dehumidification plan often extends the job rather than shortening it. Air movement without moisture removal just pushes humidity around, especially in Florida's climate. Professional monitoring is what makes drying verifiable.
Completion is based on moisture meter readings reaching dry standards for each material, plus visual confirmation and documentation. Ask for the final moisture log, it is your proof that drying was verified, not assumed.
What to do in the first minutes, hours, and day.
How professional extraction shortens every later phase.
The science of getting buildings truly dry in Florida humidity.
Records that protect your claim through every phase.
What drives the cost of each phase up or down.
Restoration help across 255 Florida cities.
Call now to start with inspection and moisture mapping, the step everything else depends on.
Structural drying is the technical heart of water damage restoration, and it is where good companies separate from bad ones. Drying is not about running fans until things feel dry. It is a controlled process of moving moisture out of building materials and out of the air, verified with instruments at every step.
After water extraction removes the bulk water, we map every wet material with moisture meters and thermal imaging. Then air movers create rapid airflow across wet surfaces while commercial dehumidifiers pull the evaporated moisture out of the air. In wall cavities, specialized injection systems push dry air behind drywall without tearing the whole wall open. Readings are logged daily, and equipment is repositioned as the drying front moves through the structure.
Drywall can feel dry to the touch while the framing behind it still holds enough moisture to grow mold. In Florida humidity, that hidden moisture becomes a mold colony within weeks. We consider a material dry only when meter readings return to the dry standard for that material, not before. That discipline is the difference between a restoration that lasts and one that generates a mold remediation bill six months later.
Most single-room residential dry-outs take three to five days. Multi-room losses, saturated hardwood and concrete slabs take longer because dense materials release moisture slowly. Beware any company that promises a fixed timeline before measuring anything. Real drying time comes from readings, not guesses. For an assessment of your situation, call (833) 606-6010 any time.